
Introduction
If you own a dirt bike, you know how essential it is to keep every part of your bike in optimal working condition. One of the most crucial parts that need regular attention is the dirt bike chain. A chain that’s too loose or too tight can lead to serious damage to your bike’s drivetrain, or worse, cause an accident while riding. This guide will explain how to tighten a dirt bike chain, provide tips for maintaining it, and walk you through common chain problems that riders face.
Whether you are a beginner or an experienced rider, knowing how to properly adjust and maintain your chain will not only ensure smoother rides but also enhance the performance and longevity of your dirt bike.
Why is Chain Tightening Important?
The chain on your dirt bike is responsible for transferring power from the engine to the wheels, helping your bike move. A well-maintained chain ensures smooth gear shifting and smooth performance, while a loose or tight chain can cause significant issues like poor power transfer, loss of acceleration, or even damage to other components.
When a dirt bike chain is improperly tensioned, it can lead to several problems:
- Excessive Wear and Tear: A loose chain can cause rubbing against other parts of your bike like the swingarm, which will wear out your chain and sprockets faster.
- Chain Slipping: A chain that’s too loose may not transfer power properly from the engine to the wheels, causing a loss of traction and performance.
- Damage to Components: A chain that is too tight can strain the chain and sprocket, causing them to wear down prematurely, potentially damaging the bearings or axle.
- Increased Risk of Chain Breaking: An excessively tight chain can break mid-ride, causing a dangerous situation.
Knowing how to properly tighten and maintain your chain will ensure that your bike runs smoothly, safely, and efficiently.
Signs That Your Dirt Bike Chain Needs Tightening
Before we dive into the process of tightening a chain, it’s important to understand how to identify when your dirt bike chain needs adjustment. Here are the key signs that your chain may need tightening or maintenance:
- Slapping Noise: If you hear a constant slapping or tapping sound while riding, it’s a sign that your chain is too loose.
- Poor Power Transfer: If you feel a delay when you accelerate or notice the bike jerking, it could be due to a loose chain that’s not transferring power effectively.
- Chain Rubbing Against the Swingarm: A chain that’s too loose can rub against the swingarm, causing damage to both the chain and the bike’s frame.
- Excessive Chain Movement: If you can move the chain more than a few centimeters with your fingers, it’s too loose.
- Difficulty Shifting Gears: If shifting gears becomes harder than usual or the bike feels sluggish, it could be due to a tight or loose chain.
Once you notice any of these signs, it’s time to inspect and tighten your chain to prevent further damage.
Tools You’ll Need for Tightening a Dirt Bike Chain
Before you begin tightening your dirt bike chain, ensure that you have the necessary tools for the job. Here’s a list of what you’ll need:
- Socket Wrench Set: For loosening and tightening bolts, particularly the axle nut. A 32mm socket is commonly used for the axle nut on most dirt bikes.
- Spanners: A 10mm spanner (for bolts) and a 12mm spanner (for locking nuts) are often required.
- Torque Wrench: A torque wrench helps ensure that you’re tightening bolts to the correct specifications. The recommended torque for an axle nut is typically around 72.5 foot-pounds (check your bike’s manual).
- Measuring Tape or Ruler: To measure the correct chain slack and ensure it is within the manufacturer’s recommended limits.
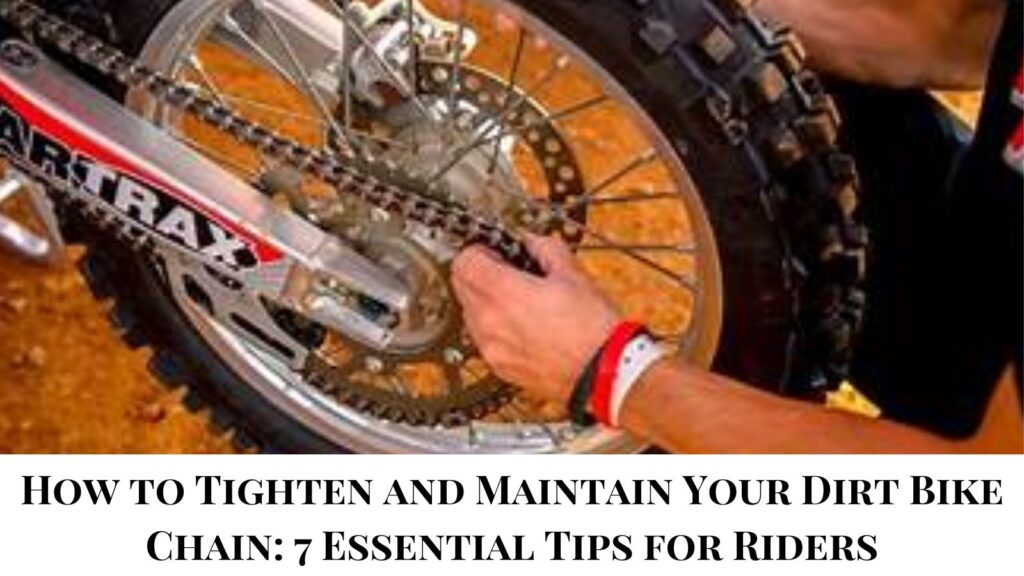
- Chain Lubricant: A good quality lubricant will reduce friction and extend the life of your chain.
With these tools on hand, you’ll be ready to tighten and maintain your chain correctly.
Step-by-Step Guide to Tightening Your Dirt Bike Chain
Now that you have everything ready, follow these steps to properly tighten your dirt bike chain:
Step 1: Loosen the Axle Nut
- Lift the Bike: Use a bike stand to lift your dirt bike, ensuring that it’s stable before you start working on it.
- Loosen the Axle Nut: The first task is to loosen the axle nut. Use your 32mm socket wrench to remove or slightly loosen the axle nut on the rear wheel. Do not remove it completely; just loosen it enough to allow adjustment.
Step 2: Loosen the Chain Adjuster Bolts
Next, you’ll need to adjust the rear axle to increase or decrease chain tension:
- Locate the Chain Adjuster: The chain adjusters are located on both sides of the swingarm.
- Loosen the Lock Nuts: Using the 12mm spanner, loosen the lock nuts that secure the chain adjuster.
- Adjust the Chain Tension: Using the 10mm spanner, turn the adjuster bolts in small increments on both sides of the swingarm. Tighten or loosen each side evenly to ensure that the chain remains straight and properly aligned. Adjust the wheel slightly forward or backward until the desired tension is achieved.
Step 3: Check the Chain Slack
The ideal chain slack will vary depending on your dirt bike model, but a general guideline is about 40-50mm of movement at the bottom of the chain. This is approximately the distance you should be able to move the chain up or down when it’s properly adjusted.
To measure:
- Place your fingers under the chain to check for slack.
- Adjust the adjuster bolts until you achieve the recommended chain slack.
- Make sure the chain moves smoothly but isn’t too loose or tight.
Step 4: Tighten the Axle Nut
Once you’ve adjusted the chain, it’s time to tighten the axle nut. Use your torque wrench to tighten the axle nut to the recommended torque (usually 72.5 foot-pounds). This ensures the axle is properly secured without overtightening.
Step 5: Tighten the Lock Nuts
- Go back to the chain adjusters and tighten the lock nuts. This will secure the adjustments you made earlier and keep the wheel in place.
- Re-check the chain slack after tightening to ensure the adjustments are still correct.
Step 6: Check Alignment
Ensure that both sides of the swingarm are aligned properly. The lines on the chain adjuster blocks should be even on both sides. If the alignment is off, your chain could wear unevenly, causing damage to both the sprockets and the chain.
What Happens If Your Dirt Bike Chain Is Too Loose?
A loose chain can lead to several problems:
- Chain Slipping Off: If the chain is too loose, it may slip off the sprockets, causing a sudden loss of power transfer. This could cause you to lose control of your bike.
- Rubbing on the Swingarm: A loose chain can rub against the swingarm, causing damage to the bike’s frame and wear on the chain.
- Increased Chain Wear: A loose chain puts excessive strain on the sprockets, leading to quicker wear and tear on both the chain and sprockets.
To prevent these issues, make sure your chain has the proper tension.
What Happens If Your Dirt Bike Chain Is Too Tight?
While a loose chain causes its own set of problems, a chain that is too tight also presents issues:
- Harder Wheel Movement: A tight chain will increase the resistance when the rear wheel turns, making it harder to ride.
- Excessive Pressure: Tight chains put a lot of strain on the drive shaft, sprockets, and even the bearings, leading to premature wear and failure.
- Damaged Suspension: A chain that is too tight can affect your bike’s suspension, making it harder for the system to compress properly, reducing comfort and control.
FAQs About Dirt Bike Chain Maintenance
1. How often should I adjust my dirt bike chain?
It’s recommended to check and adjust your dirt bike chain every few rides, especially if you’re riding on rough terrain. Always check the chain after any long rides or jumps.
2. How tight should my dirt bike chain be?
The chain should have approximately 40-50mm of slack at the bottom of the chain. Check your owner’s manual for specific measurements for your model.
3. What happens if I don’t adjust my chain regularly?
If your chain is left unadjusted for too long, it can cause damage to your sprockets, swingarm, and other components. It could also lead to safety issues like chain slippage or failure.
4. Can a chain be too tight for a dirt bike?
Yes, a chain that is too tight can cause excessive stress on the bike’s drivetrain and suspension system, leading to premature wear or even component failure.
5. How do I know if my chain needs replacing?
If your chain is severely worn, has visible links that are too stretched, or skips on the sprockets, it may be time to replace it. Regular maintenance and lubrication will extend the lifespan of your chain.
MUST READ:
Motorcycle Chain Problems: An In-depth Look – AuttoMotoGeek
Grasping Motorcycle Transmission Issues and Fixes – AuttoMotoGeek
Conclusion
Tightening your dirt bike chain is a simple but essential part of routine maintenance that helps ensure your bike performs optimally and lasts longer. Whether you’re a beginner or an experienced rider, regularly checking and adjusting your chain’s tension will save you from costly repairs and improve your bike’s overall performance. By following these steps, you’ll keep your chain in perfect condition, allowing you to enjoy smoother, safer rides.