
If you love motorcycles, you know the chain is vital. A well-maintained chain ensures smooth rides and effective power transfer. It also helps your bike last longer. However, chains can wear out like any other mechanical part. In this article, we’ll look at how to repair a motorcycle chain. We’ll look at common issues like loose or rusted chains. Also, we’ll share important maintenance tips to keep your bike’s chain in top condition.
Why Motorcycle Chains Matter
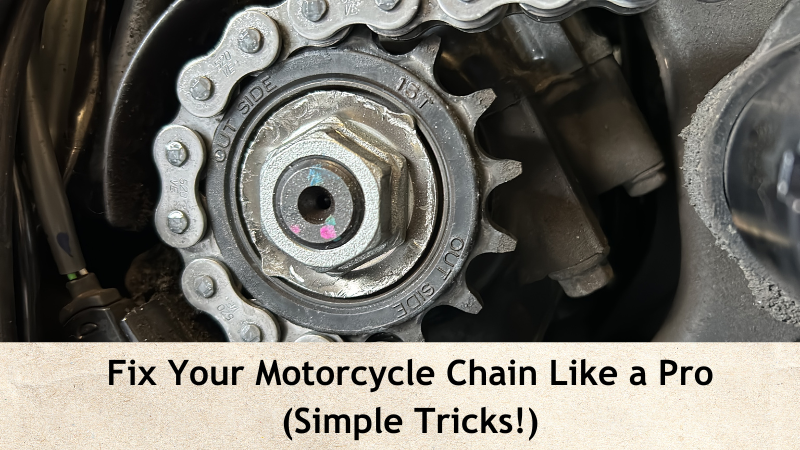
The motorcycle chain is an essential component of the drivetrain. It connects the engine to the rear wheel, transmitting power to propel the bike forward. As one of the most hardworking parts of your bike, the chain endures constant motion, friction, and pressure. Over time, chains wear out, stretch, or become rusty, which can lead to performance issues. Regular maintenance and quick repairs will boost your bike’s performance. They will also help avoid expensive repairs later on.
Common Chain Problems and Their Solutions
1. Loose Chains
A loose motorcycle chain is a common problem. It can make your bike feel unstable. You might also hear strange noises while riding. A loose chain can affect performance, leading to skipping or jerking during acceleration.
Solution: To fix a loose chain, you’ll need to adjust the tension. This involves loosening the rear axle and adjusting the chain’s tightness. Follow your motorcycle’s manual for the correct tension. Different bikes have different specifications. Usually, a loose chain should have 0.5 to 1 inch of slack. Always check the manufacturer’s guidelines.
2. Tight Chains
If your motorcycle chain is too tight, it strains the sprockets. This leads to faster wear. A tight chain also causes poor power transfer. You may notice sluggish acceleration and more breakdowns.
Solution: If the chain is too tight, you’ll need to loosen the tension by adjusting the rear axle. Make sure that you don’t overcompensate by loosening it too much. An appropriately tensioned chain will move smoothly but won’t sag too much.
3. Rust and Corrosion
Rust can be a big problem. This is especially true if you ride in the rain a lot or keep your bike outside. Rust weakens the chain, reducing its efficiency and lifespan.
Solution: Regular cleaning and lubrication are key to preventing rust. If your chain is already rusty, use a rust remover, followed by a thorough cleaning. After cleaning, use a good chain lubricant. This helps stop rust and keeps the chain running smoothly.
4. Worn Links
Worn links are often a result of poor maintenance or excessive use. A worn link can lead to skipping or jumping. It might even break. This can create dangerous situations while riding.
Solution: If you notice a worn link, it’s time to replace it. Chains can be repaired by removing the broken or worn link and replacing it with a new one. You’ll need to purchase a new link and a C-clip (or master link) to secure the new link in place.
Step-by-Step Guide on How to Repair a Motorcycle Chain
Fixing a motorcycle chain might look hard, but it’s easy if you follow the right steps. Let’s go through the repair process in detail.
Step 1: Identify the Problem
Before diving into repairs, inspect the chain to identify the issue. Look for rust, wear, broken links, or a loose or tight chain. If the chain is badly damaged, it’s often best to replace it instead of trying to fix it.
Step 2: Gather the Necessary Tools
For chain repair, you’ll need a few basic tools:
- Flat screwdriver
- Chain tool (or chain breaker)
- New chain link and C-clip (master link)
- Pliers
- Lubricant
Step 3: Locate the Master Link
Most motorcycle chains include a master link. This link is easy to remove, so you can detach the chain quickly. Look for the master link in your chain, which is usually identifiable by its clip or pin.
Step 4: Remove the Master Link
To begin the repair process, you’ll need to remove the master link. Insert a flat screwdriver into the C-clip of the master link and pry it off carefully. You might also use a chain tool to push out the pin that holds the master link together. Once the C-clip is removed, the chain can be separated.
Step 5: Remove the Worn or Broken Link
Once you’ve detached the chain, identify the damaged link. Using your chain tool or pliers, remove the broken link by either grinding the pin or pressing it out. Be sure to follow safety precautions. Wear gloves and safety glasses.
Step 6: Install the New Link
Once the broken link is removed, take the new link and slide it into the chain. Use the chain tool to press the new pin into place. Ensure that the link is aligned with the rest of the chain and that it moves freely.
Step 7: Secure the Link with a C-clip
After installing the new link, use a C-clip to secure it in place. Press the C-clip into the groove on the pin, ensuring it is securely attached. Double-check that the C-clip is properly in place before proceeding.
Step 8: Reattach the Chain
With the new link in place, you can now reattach the chain to the sprockets. Carefully position the chain on the sprockets, ensuring the teeth are properly engaged. Tighten the rear axle and ensure that the chain has the correct tension (0.5 to 1 inch of slack).
Step 9: Lubricate the Chain
After the chain is fixed and put back on, make sure to lubricate it well with a good chain lubricant. This will help prevent rust and ensure smooth operation. Wipe off any excess lubricant with a clean cloth.
How to Maintain Your Motorcycle Chain
Regular maintenance is key to extending the life of your motorcycle chain. Here are three easy steps to keep your chain in top condition:
1. Regular Cleaning
Cleaning your motorcycle chain is key. It stops dirt and grime from piling up. Over time, dust, mud, and other debris can cause the chain to wear down. Clean your chain every three to four months using a gentle brush and degreaser. You can also use a chain cleaning tool for more efficient cleaning.
2. Lubrication
Good lubrication is essential. It helps prevent rust, cuts down friction, and keeps the chain running smoothly. Use a quality motorcycle chain lubricant, and apply it regularly. Aim to lubricate your chain after each ride in wet conditions or every 500 miles for regular riding.
3. Inspect for Wear
Regularly inspect your chain for signs of wear and tear. Look for stretched links, rust, or any visible damage. If you notice that the chain has stretched too much, it may need to be replaced. Also, check for any loose links or parts that need tightening.
FAQs
1. How often should I lubricate my motorcycle chain?
Lubricate your chain every 500-1000 miles or after riding in wet conditions to prevent rust and ensure smooth operation.
2. What should I do if my motorcycle chain is too loose or tight?
Adjust the tension so the chain has 0.5 to 1 inch of slack. If unsure, consult a mechanic for proper tensioning.
3. Can I repair a broken motorcycle chain myself?
Yes, with the right tools, you can repair it by removing the broken link, inserting a new one, and securing it with a C-clip.
4. How can I tell if my motorcycle chain needs replacement?
Check for excessive wear, rust, or stretching. If the chain is too worn, it’s best to replace it to avoid damaging the gears.
Conclusion
Motorcycle chain maintenance and repair are crucial to keeping your bike running smoothly. A well-kept chain boosts performance, enhances safety, and saves you money over time. By following the steps above, you can fix minor chain problems and keep your chain in top shape.
The key to a healthy motorcycle chain is regular maintenance. This includes cleaning, lubrication, and checking tension. By staying proactive, you’ll keep your bike in top shape for years to come.
If you have questions or need help with motorcycle chain maintenance or repair, just ask!