Just as every instrument in an orchestra contributes to the creation of harmonious melodies, every component of your motorcycle has a role to play in ensuring your ride is smooth and safe. The symphony of your motorcycle, however, can quickly turn into a cacophony if the clutch cable is faulty or poorly maintained.
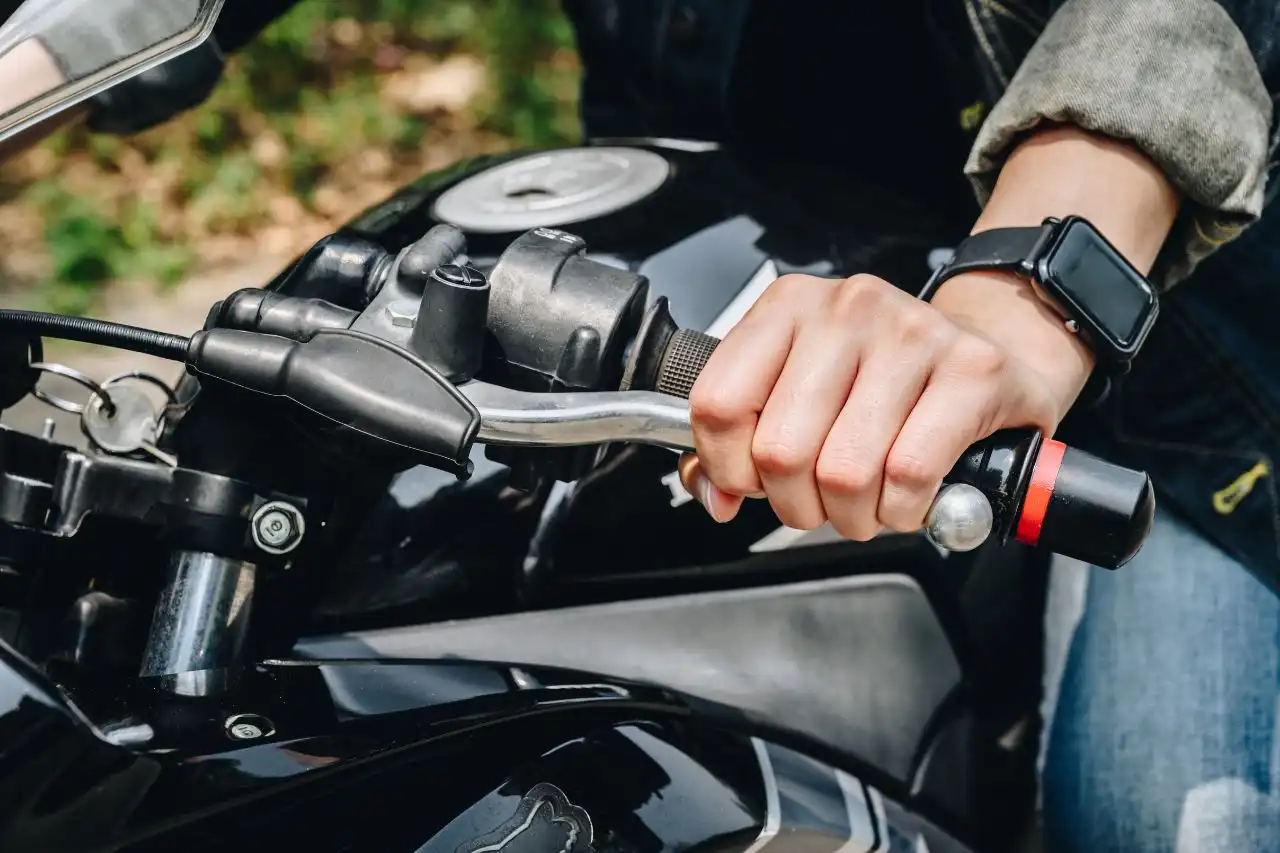
Think of the clutch cable as the conductor of your motorcycle’s orchestra. It plays a critical role in controlling the interaction between the engine and the transmission, allowing you to change gears smoothly and maintain control over your speed.
Ignorance of the poor state of your clutch cable is not bliss but a precursor to a potential disaster. It could lead to the inability to disengage the clutch, making gear changes erratic and dangerous, disrupting your ride, and potentially placing you in harm’s way.
Common symptoms of a malfunctioning clutch cable
Trouble begins to brew when you notice your motorcycle behaving unusually. It’s as though your trusty steed has developed a mind of its own, refusing to heed your commands as it once did. In such cases, a faulty clutch cable is often the culprit.
- Stiff Clutch: When the clutch lever becomes increasingly difficult to press, the cable may be in distress.
- Clutch Slippage: If the motorcycle doesn’t respond immediately to your clutch release, it may be slipping due to a stretched cable.
Unresponsive Clutch: In extreme cases, the clutch may fail to engage or disengage entirely, signaling a severely damaged or broken cable.
These symptoms are the motorcycle’s distress signals, shouting loudly for your attention. Heed them, for ignoring these signs could lead to more severe and costly mechanical failures.
Inspecting the clutch cable
Like a seasoned detective, you must now turn your discerning eye to the physical inspection of the clutch cable. This is a tale of two ends – the lever end and the clutch end. Examine both for signs of wear, fraying or damage.
Remember, the clutch cable is a vital artery in the lifeblood of your motorcycle. Its health is paramount to your journey. Like a doctor checking a patient’s pulse, you must be thorough and attentive in your examination.
| Examination Point | Symptoms of Damage |
|---|---|
| Clutch Lever End | Visible fraying, stiffness, rust |
| Clutch End | Visible fraying, stiffness, rust, inability to properly engage/disengage |
Having completed this initial diagnosis, you are better equipped to tend to your motorcycle’s needs. The road to recovery begins with understanding, and you are now one step closer to restoring harmony between you and your mechanical companion.
You must read:
- How To Fix a Sticking Throttle Cable on a Motorcycle
- How to Fix Front Brakes on a Motorcycle: Symptoms, Causes & Fixes
Tools needed to fix a clutch cable
Just as a master artist requires a palette of fine brushes and colors, so too does the motorcycle enthusiast require an arsenal of tools to maintain the mechanical poetry of their ride. One of the most common yet intricate tasks is fixing a clutch cable. The operation is akin to threading a silver strand through the intricate tapestry of the motorcycle’s mechanical heart.
“Acquiring the right tools for the job is akin to possessing the right words for a poem. Both are essential for creating a masterpiece.”
The Round Table of Tools
With the steel steed disarmed, the knight – that is, the motorcycle maintenance enthusiast – must first gather his tools. These are not merely instruments; they are extensions of your will, shaping the machine according to your needs. Let us begin by enumerating these tools:
- Replacement Clutch Cable: The star of our show, the brand-new lifeline for your motorcycle.
- Wrench Set: The knights of our round table, ready to battle against stubborn bolts and screws.
- Needle nose pliers: The surgeon’s scalpel, designed to tease out those tricky little parts with precision.
- Lubricant: The elixir of life for your clutch cable, ensuring smooth movements and a long life.
- Rags: The humble servants, ever-ready to clean up the mess.
Their Roles in Our Mechanical Ballet
Having introduced our cast, let us proceed to outline their roles in this mechanical ballet:
| Tool | Role |
|---|---|
| Replacement Clutch Cable | This is the hero of our story, replacing the old, worn-out cable with renewed vigour. |
| Wrench Set | These are the workhorses of the operation, loosening and tightening the necessary bolts to free the old cable and secure the new one. |
| Needle nose pliers | The precision instrument of the operation, used to remove the old cable and feed the new one into position. |
| Lubricant | Ensures a long and smooth life for the new cable, reducing friction and preventing wear and tear. |
| Rags | Used for cleaning up the workspace and wiping down the tools post-operation, keeping everything neat and tidy. |
In the hands of the experienced, these tools become the instruments of resurrection, breathing new life into your steed with a brand-new clutch cable.
Step-by-step guide to fixing a clutch cable
Embarking on the journey of fixing a motorcycle clutch cable can seem like a daunting endeavor, but with the right steps and a determined spirit, it is a task that can be conquered with ease. Like a well-written symphony, each step harmoniously builds upon the last, culminating in a triumphant crescendo of success.
“The most daunting tasks are often the most rewarding. In the dance of mechanics, each step is a learned pirouette in the ballet of function and design.”
1. Gather Your Tools
Before venturing into the heart of the operation, one must first gather the necessary equipment. As a sculptor requires his chisel and mallet, so too does a mechanic need his tools.
- Screwdrivers: These are your chisels, carving the way forward.
- Pliers: These are your clamps, holding the world steady.
- Lubricant: Your oil on the gears of progress.
- New clutch cable: The phoenix that will rise from the ashes of the old.
2. Locate and Remove the Old Clutch Cable
Every motorcycle, like every living creature, has its own unique anatomy. One must familiarize oneself with the layout of their machine and locate the clutch cable. Once found, it needs to be gently coaxed from its habitat using your tools.
“The heart of the machine is not hidden to those who know where to look.”
3. Install the New Clutch Cable
With the old cable removed, the stage is set for the new one to take its place. This process, akin to a snake shedding its skin, is a rebirth, a new beginning for your motorcycle. Attention to detail is paramount here. The new clutch cable needs to be threaded through the same path as the old one, and then connected to the clutch lever.
4. Adjust the Clutch Cable
The final act in our little mechanical play is the adjustment of the clutch cable. This step is akin to tuning a guitar, striking the perfect balance between tension and slack to achieve a harmony of movement and control. The clutch lever should have a little bit of free play, but not too much.
| Too Tight | Just Right | Too Loose |
|---|---|---|
| Clutch engages too quickly | Smooth engagement, a bit of free play | Clutch doesn’t fully engage |
In this dance of mechanics, you are not just a passive observer, but an active participant, shaping and molding the dance to suit your desires. So, grab your tools and let’s fix that clutch cable, together.
Tips for maintaining a healthy clutch cable
Like the heart of a warrior, your motorcycle’s clutch cable serves as an essential link in the chain of command, carrying your directives from the handlebars to the mechanical innards of your noble steed. Keeping this pivotal player in peak condition is not merely a matter of routine maintenance; it’s a nod to the intricate ballet of man and machine, an acknowledgement of the dance that is riding.
The Symphony of Inspection
To ensure the song of your motorcycle doesn’t become a dirge, regular inspection of your clutch cable is paramount. Like a maestro conducting an orchestra, you must be intimately familiar with each component and how it functions in the grand symphony of your machine.
- Visual Inspection: Look for any signs of fraying or damage to the outer casing of the cable.
- Operational Testing: Feel the clutch lever’s action. It should pull smoothly and return to its rest position when released.
- Adjustment Check: Ensure the cable has the proper free play. Too much or too little can lead to poor clutch operation and increased wear.
“A well-inspected clutch cable is a symphony in progress, each part playing its part in perfect harmony.”
The Art of Cleaning and Lubrication
Like a sculpture requires the gentle touch of a master craftsman, so too does your clutch cable demand careful cleaning and lubrication. This is not a task to be rushed, but a ritual to be savored.
- Removal: Disconnect the cable at both ends and carefully remove it from the motorcycle.
- Cleaning: Wipe down the cable with a clean cloth, checking for any signs of damage.
- Lubrication: Apply a suitable cable lubricant along the length of the inner cable, allowing it to penetrate into the cable housing.
- Reinstallation: Reconnect the cable, ensuring it is properly adjusted and operates smoothly.
“A well-lubricated clutch cable is like a river flowing smoothly, free from the impediments of friction and wear.”
When Replacement Becomes Inevitable
Sometimes, despite our best efforts, nature takes its course and replacement becomes necessary. This is not a defeat, but an opportunity for renewal, like the phoenix rising from the ashes.
| Steps | Description |
|---|---|
| 1. Removal | Disconnect the old cable from the clutch lever and the clutch mechanism, and carefully remove it from the motorcycle. |
| 2. Installation | Thread the new cable through the same path as the old one, ensuring it is not kinked or twisted. |
| 3. Connection | Connect the new cable to the clutch mechanism and the clutch lever, ensuring it is properly adjusted and operates smoothly. |
| 4. Testing | Check the operation of the new cable, making any necessary adjustments for correct free play and smooth operation. |
“A new clutch cable is a new lease on life for your motorcycle, a rejuvenation that ensures the dance continues unabated.”
Common mistakes to avoid when fixing a clutch cable
Like a symphony, the motorcycle clutch cable is a crucial player. Without it orchestrating the grand act of gear shifting, the bike grinds to a halt, as if a conductor were suddenly absent from the orchestra pit. As one delves into the task of fixing a clutch cable, there are numerous pitfalls that can turn this symphony into a discordant cacophony.
Mistake 1: Incorrect Diagnosis
One must tread cautiously while diagnosing an issue with the clutch cable. The problem may not lie with the cable itself, but with the clutch lever or the clutch plates. It’s like blaming the violin when the problem lies in the bow. So, before you embark on this clutch cable fixing journey, ensure that you’ve diagnosed the issue correctly.
Mistake 2: Ignoring Cable Slack
One common misstep is overlooking the need for cable slack. A clutch cable that is too taut is like a string on a violin stretched too tight – both are bound to snap under tension. A little slack allows the cable to function smoothly, preventing premature wear and tear.
Mistake 3: Incorrect Installation
Incorrect installation can lead to several complications. It’s akin to a pianist playing on a misaligned piano – the music produced is bound to be off-key. Here are some specific areas to pay attention to:
- Route of the Clutch Cable: Ensure the cable is routed correctly and is not binding or rubbing against other parts.
- Adjustment: A clutch cable that is too loose or too tight can cause shifting issues.
- Lubrication: Like a well-oiled machine, your clutch cable needs lubrication to perform efficiently. Neglecting this can result in a rough ride.
Mistake 4: Neglecting Regular Maintenance
Maintenance of your clutch cable is like tuning an instrument – it’s essential for a melodious performance. Regular inspection and timely replacement of worn-out parts could save you from bigger, more expensive repairs down the line.
Remember, fixing your motorcycle clutch cable isn’t a task to be undertaken hastily or without proper knowledge. Like conducting a symphony, it requires patience, practice, and precision. Avoid these common mistakes, and your motorcycle will sing a harmonious tune.
Frequently asked questions about clutch cables
Occasionally, the melodious symphony of the open road, underpinned by the mechanical ballet of your motorcycle, hits a false note. A clutch cable that’s behaving like a wilful, out-of-tune instrument can rob your ride of its harmonious rhythm. A misbehaving clutch cable is as disruptive as a squeaky violin during a tranquil symphony. Let’s delve into this issue, diving deep beneath the surface of common questions, and into a sea of knowledge that will empower you to take control of your chariot’s reins once more.
What is the role of a motorcycle clutch cable?
Akin to the string of a puppeteer, the clutch cable dictates the dance of your motorcycle’s clutch. Its role is to transfer the rider’s input from the clutch lever into the clutch assembly, enabling the engagement and disengagement of power from the engine to the gearbox. A well-functioning clutch cable is your silent partner in the symphony of speed, silently and efficiently conducting its duties from the shadows.
How can you tell if your motorcycle clutch cable needs fixing?
Like a dancer’s subtle misstep or a musician’s missed beat, a clutch cable in need of attention will start showing signs. You might notice a stiff clutch lever, erratic gear changes, or even a complete inability to disengage the clutch. These are the heart-rending solos of a clutch cable crying out for maintenance and care.
Can you fix a motorcycle clutch cable yourself?
Indeed, with the right tools, a bit of patience, and a guiding hand, repairing a clutch cable is a task within the grasp of most. It’s like learning to play a new instrument, initially challenging, yet ultimately rewarding. Remember, every maestro was once a novice.
What are the steps to fix a motorcycle clutch cable?
The process of fixing a clutch cable is akin to tuning a precious instrument. It requires finesse, patience, and a precise touch. Here’s a step-by-step guide to help you through this process:
- First, put on your safety gear. Safety, always the unseen conductor of our mechanical symphony, cannot be ignored.
- Locate the clutch lever and adjuster. It is the maestro of your motorcycle’s clutch system.
- Loosen the adjuster to create slack in the cable.
- Remove the cable from the lever.
- Inspect the cable for any visible damage. Is it frayed like a worn-out violin bow?
- If the cable is beyond repair, replace it with a new one.
- Reattach the cable to the lever and adjust it until the clutch operates smoothly.
What tools and parts will you need?
The melody of repair requires the right instruments. Here’s what you will likely need:
| Tools | Parts |
|---|---|
| Wrench or pliers | New clutch cable (if necessary) |
| Lubricant | |
| Safety gear (gloves, safety glasses) |
Remember, a well-tuned clutch cable is like the conductor of an orchestra, unassuming yet indispensable, leading the many parts to play together in perfect harmony. So, don your mechanic’s hat, wield your tools with confidence, and get ready to restore your motorcycle’s melodious symphony.
Final Thoughts
As you ascend from the depths of the motorcycle’s internals, clutch cable successfully replaced, there’s an undeniable sense of achievement that resonates deep within you. You’ve unravelled yet another mechanical enigma, solidifying your mastery over the beast of steel and fire.
| Mission | Outcome |
|---|---|
| Replace Clutch Cable | Accomplished |
| Smooth Ride | Guaranteed |
| Mastery Over Motorcycle | Achieved |
In parting, remember this: the open road awaits, whispering promises of adventure and freedom. With a well-maintained motorcycle beneath you, and the knowledge to fix a clutch cable embedded in your mind, you are truly the master of your journey. Ride forth, conquering the tarmac beneath your wheels.


