
Introduction:
Restoring your motorcycle’s engine case may feel daunting, but it’s a rewarding project. It can save you money and boost your bike’s performance. With the right tools and clear instructions, you can change your engine case from worn to smooth. This guide is easy to follow, whether you’re a beginner or an experienced DIY.
In this guide, you’ll learn how to:
- Disassemble your engine case safely
- Inspect it for wear or damage
- Clean off grime, grease, and rust thoroughly
- Repair and machine any damaged areas for a perfect fit
- Refinish the surface using powder coating or painting techniques
- Reassemble the engine case with the correct torque and precision
- Test your work and follow break-in procedures for long-lasting performance
- Maintain your restored engine case to keep your motorcycle running smoothly
Key Takeaways
Before diving in, here are the main points you should remember:
- Confidence in Restoration: With proper guidance, you can restore your engine case by yourself.
- Step-by-Step Process: Disassemble, inspect, repair, machine, refinish, and reassemble.
- Precision Matters: Use precision machining to ensure all parts fit perfectly.
- Maintenance is Key: Routine checks and proper care keep your engine case in top shape.
- Satisfaction Guaranteed: Enjoy the sense of achievement that comes from reviving your bike’s heart while saving money.
Read more:
1. Preparing for the Engine Case Restoration
A successful restoration starts with proper planning and preparation. This phase is all about gathering the right tools, supplies, and understanding the process before you begin.
Gather Your Tools and Supplies
To ensure you have everything needed for the restoration, prepare a dedicated workspace and gather these essential tools:
- Socket sets, wrenches, and screwdrivers: For removing and reinstalling bolts and screws.
- Degreasing solvents: Special cleaning agents to remove grease and grime.
- Abrasive pads and wire brushes: To scrub away rust and old coatings.
- Protective gear: Gloves, safety glasses, and possibly a dust mask.
- Replacement parts: New gaskets, seals, or any small parts that might be worn or damaged.
- Precision machining tools: If available, or access to a machine shop for detailed repairs.
- Cleaning rags and a soft cloth: For wiping down surfaces after cleaning.
Setting Up Your Workspace
- Clean and organized area: Ensure your workspace is free of clutter, with ample lighting and ventilation.
- Labeling materials: Have a marker or labels ready to mark parts during disassembly so you know where everything belongs.
Taking the time to gather the right tools and set up a proper workspace makes the entire process smoother and reduces the risk of losing small parts or making mistakes during disassembly.
2. Disassembling the Engine Case
Disassembling the engine case is your first hands-on step. This process allows you to inspect every part of the case and identify areas that may need repair.
Step-by-Step Disassembly
- Refer to the Service Manual: Always start by consulting your motorcycle’s service manual. It contains specific instructions and diagrams tailored to your model.
- Work Slowly and Carefully: Remove bolts and screws in a systematic order. Using a crisscross pattern can help prevent warping or stressing the engine case.
- Label Each Part: As you remove parts, label them with numbers or write notes about their original positions. This makes reassembly much easier.
- Keep Hardware Organized: Place bolts and small parts in labeled containers or bags to avoid misplacing them.
Why Proper Disassembly Is Critical
- Prevents Damage: Careful disassembly avoids additional damage to the engine case or its components.
- Aids Inspection: A systematic approach helps you easily spot any damage or wear on individual parts.
- Simplifies Reassembly: Knowing exactly where each part goes ensures that the engine will be reassembled correctly, maintaining proper alignment and function.
3. Inspecting the Engine Case for Damage
Once you’ve disassembled the engine case, take time to inspect each component. This step helps you determine the extent of repairs needed.
What to Look For
- Cracks and Fractures: Carefully check the engine case walls, mounting surfaces, and bearing areas.
- Warping or Deformation: Look for signs of warping that could affect engine alignment.
- Pitting and Scoring: Use a magnifying glass to spot minor damage that may worsen over time.
- Blockages in Oil Passages: Make sure all oil channels are clear and free from debris.
Common Areas of Concern
Inspection AreaCommon IssuesPotential ImpactMounting SurfacesCracks, warping, uneven wearCan lead to improper alignment, increased vibration, and leaksBearing SurfacesPitting or scoringMay cause premature bearing failure, engine seizure, or power lossOil PassagesBlockages or small cracksCould result in inadequate lubrication and overheating
If you find major damage, like large cracks or severe warping, consult a professional mechanic or machine shop. Fixing these issues may need advanced welding or machining skills.
4. Cleaning the Engine Case Thoroughly
After inspecting and noting any damage, the next step is a deep clean. A clean surface is essential for effective repairs and a quality finish.
Removing Grime, Grease, and Rust
- Use a Degreaser: Start by applying a heavy-duty degreaser to break down the grease and oil built up on the surfaces.
- Scrub with Abrasive Pads: Use a wire brush or abrasive pad to scrub off stubborn rust or dirt.
- Rinse Thoroughly: After scrubbing, rinse the case with clean water to remove any residual cleaning agents and loosened debris.
- Dry Completely: Allow the engine case to dry fully. Moisture can interfere with the subsequent refinishing process.
Degreasing and Surface Preparation
- Attention to Detail: Make sure no spots are missed during cleaning. Even small amounts of grime can prevent a new finish from adhering properly.
- Re-inspect After Cleaning: Once the engine case is clean, re-inspect the surfaces to ensure that all contaminants have been removed.
“Proper degreasing and surface preparation are the keys to a long-lasting restoration.”
5. Repairing and Machining the Engine Case
Now that your engine case is clean and inspected, it’s time to address any repairs. This stage is crucial for restoring the engine case to its original condition.
Identifying and Addressing Damage
- Cracks and Structural Damage: Use welding or high-strength epoxy to fill and repair any cracks. If the damage is extensive, a professional machine shop may be necessary.
- Wear and Pitting: In areas where there is significant wear, consider precision machining. This process involves removing a small amount of material to create a smooth, even surface.
- Reinforcing Weak Spots: Sometimes, additional reinforcement is needed in areas that have been weakened by damage or wear.
Precision Machining for a Perfect Fit
Precision machining ensures that every part of your engine case fits together seamlessly. Follow these guidelines:
- Measure Accurately: Use precision tools to measure the dimensions of the repaired areas.
- Use Specialized Tools: If available, use CNC machines or consult a professional machinist for the best results.
- Check Fitments: Once machining is complete, test the fit of each component before moving on to reassembly.
“Precision machining is essential to ensure a perfect fit and optimal engine performance.”
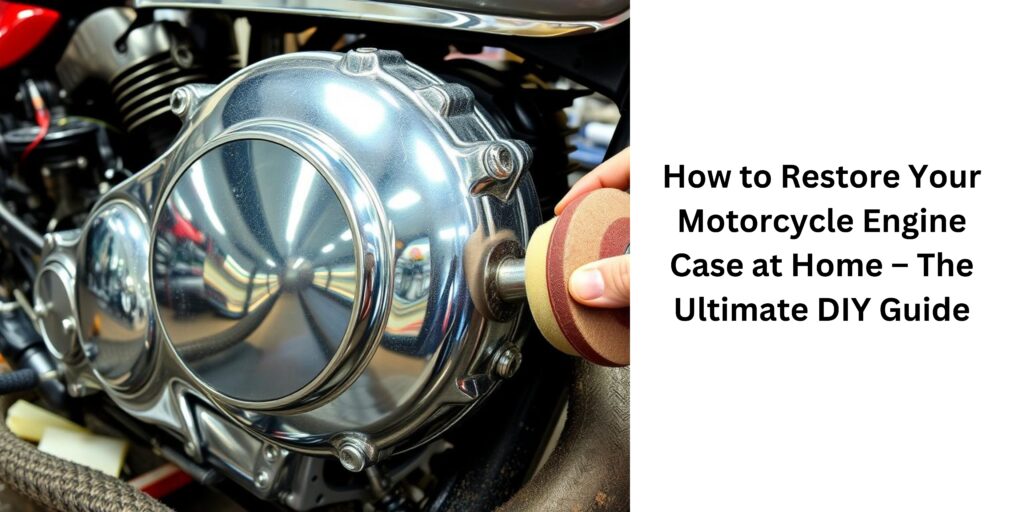
6. Refinishing the Engine Case
With repairs and machining completed, the next phase is refinishing the engine case. A proper finish not only enhances appearance but also protects against future wear.
Choosing the Right Refinishing Method
There are two popular methods for refinishing an engine case:
- Powder Coating:
- Advantages: Powder coating creates a durable, chip-resistant finish that is resistant to fading and corrosion.
- Process: The engine case is covered in a dry powdered paint and then baked at high temperatures to create a hard, protective layer.
- Traditional Painting:
- Advantages: Traditional painting offers a classic look and can be customized with high-quality motorcycle paints.
- Process: Ensure the surface is perfectly smooth before applying several coats of paint, allowing each coat to dry fully.
Step-by-Step Refinishing Process
- Prepare the Surface: Ensure that the engine case is completely clean and dry.
- Apply the Chosen Finish: Whether using powder coating or traditional painting, apply the finish evenly. For powder coating, follow the manufacturer’s instructions for baking. For painting, use multiple thin coats.
- Cure Properly: Allow the finish to cure fully before handling the engine case. This ensures durability and a lasting appearance.
The right finish can make your engine case look brand new, protecting it against future wear and tear.
7. Reassembling the Engine Case Components
After repairs and refinishing, it’s time to reassemble your engine case. This step requires attention to detail, especially when it comes to torque specifications and the order of reassembly.
Reassembly Guidelines
- Follow the Manufacturer’s Manual: Always refer to your motorcycle’s service manual for detailed reassembly instructions.
- Use the Correct Torque: Tighten bolts to the exact specifications mentioned in the manual. A proper torque wrench is essential here.
- Apply Thread-Locking Compound: For bolts that are prone to loosening, apply a thread-locker to ensure they stay secure.
- Reassemble in the Right Order: Reassemble the engine case step by step, ensuring that every part is correctly aligned and securely fastened.
- Double-Check Everything: Once assembled, review your work carefully. Look for any misaligned parts or loose bolts before moving to testing.
Proper reassembly is key to ensuring that your engine will run smoothly and efficiently.
8. Testing and Break-In Procedures
Before you hit the road, it’s important to test the engine and follow proper break-in procedures. This step ensures that your work was done correctly and that the engine will operate safely.
Testing the Engine
- Visual Inspection: Double-check all fasteners, seals, and connections.
- Initial Start-Up: Start the engine and let it idle for 10-15 minutes. Listen for any unusual noises or vibrations.
- Gradual RPM Increase: Over the next 30-60 minutes, slowly increase the engine speed. Do not stress the engine by revving too high too quickly.
- Monitor Performance: Watch for signs of leaks, abnormal vibrations, or performance issues. If any issues arise, address them immediately before proceeding.
Frequently Asked Questions (FAQ)
Q: What tools do I need to restore my motorcycle engine case?
A: You’ll need a range of tools including socket sets, wrenches, screwdrivers, degreasing solvents, abrasive pads, and protective gear like gloves and safety glasses. Having replacement gaskets and seals on hand is also a good idea.
Q: How do I properly disassemble the engine case?
A: Start by consulting your motorcycle’s service manual for specific instructions. Remove bolts and screws slowly, label every part, and keep small components organized in labeled containers. This methodical approach prevents damage and simplifies reassembly.
Q: What should I look for during the inspection phase?
A: Start by consulting your motorcycle’s service manual for specific instructions. Remove bolts and screws slowly, label every part, and keep small components organized in labeled containers. This methodical approach prevents damage and simplifies reassembly.
Q: How important is cleaning before repairs?
A: Very important! Thorough cleaning ensures that all grease, grime, and rust are removed, which is critical for effective repairs and a durable finish. Without proper cleaning, any new finish may not adhere well.
Q: What methods can be used for refinishing the engine case?
A: You can choose between powder coating, which offers a durable and chip-resistant finish, or traditional painting, which can be customized to your taste. Both methods require a clean, well-prepared surface to be effective.
Break-In Procedures
Breaking in the engine is vital. It helps all parts settle into their proper positions and work together smoothly.
- Initial Break-In: During the first few hundred miles, avoid high speeds and heavy loads. Gradually increase the engine load and RPM.
- Oil Change: Change the oil and filter after the break-in. This removes contaminants that may have built up early on.
- Follow Manufacturer Guidelines: Always check your motorcycle’s specific break-in recommendations for the best results.
9. Maintenance Tips for a Restored Engine Case
Once your engine case is restored and the engine is running smoothly, proper maintenance is essential to keep your motorcycle performing at its best.
Protecting Your Investment
- Proper Storage: Store your motorcycle in a clean, dry, and temperature-controlled environment to prevent rust and damage.
- Regular Cleaning: Wipe down the engine case after rides to remove dirt, grease, and road salt.
- Inspection Schedule: Regularly inspect the engine case for any signs of wear, loose bolts, or damage.
Routine Inspections and Maintenance
- Monthly Visual Inspections: Look for any cracks, dents, or unusual wear. Address issues immediately before they worsen.
- Fastener Checks: Every 500 miles or so, check the tightness of all fasteners and retorque if necessary.
-
- Annual Gasket and Seal Replacement: Replace worn gaskets and seals. This helps prevent leaks and keeps the engine running well.
- Oil and Filter Changes: Change the oil and filters as the manufacturer recommends. This is especially important after the break-in period.
Routine maintenance not only protects your engine case but also extends the life of your motorcycle. A little regular care goes a long way in preserving your investment.
Conclusion
Restoring your motorcycle’s engine case requires patience, attention to detail, and a desire to learn. This guide will help you turn your engine case into a strong, efficient part of your motorcycle. You’ll handle careful disassembly, thorough cleaning, precision repairs, machining, refinishing, and reassembly. With the right tools and techniques, the whole process is manageable..
Taking on this project will not only save you money but also give you a deep sense of satisfaction and pride. Every time you ride your motorcycle, you’ll be reminded of the hard work and care you invested in reviving its core. So, roll up your sleeves, gather your tools, and enjoy the journey of restoring your bike to its full glory.