
Keeping your motorcycle gas tank in top shape is key for great engine performance and a smooth ride. If your bike’s tank is rusty, dented, or needs a new paint job, this guide is for you. It covers everything from cleaning off rust to applying protective coatings.
You’ll learn how to bring your bike’s fuel tank back to life. Whether it’s covered in rust or just needs some care, this article will help.
Key Takeaways
- Understand the importance of a clean and well-maintained motorcycle gas tank
- Gather the necessary tools and supplies for the restoration process
- Learn how to safely remove the gas tank from your motorcycle
- Discover effective methods for removing rust and corrosion from the tank
- Explore options for sealing and coating the interior of the tank
- Learn how to refinish and repaint the exterior of the gas tank
- Properly reinstall the restored gas tank back onto your motorcycle
Understanding the Importance of a Clean Gas Tank
Keeping your motorcycle’s gas tank clean is key to its health and life span. Over time, rust, corrosion, and contaminants can harm your bike’s fuel system. This can lead to poor performance and engine damage. As a motorcycle lover, restoring your gas tank is vital for your bike’s performance.
A clean gas tank brings many benefits. It can make your motorcycle last longer and ride smoother. By fixing issues like motorcycle fuel tank restoration or vintage motorcycle tank restoration, you can:
- Improve fuel flow and combustion, leading to better gas mileage and engine performance.
- Prevent clogging of the fuel system, including the carburetor or fuel injection components.
- Eliminate the risk of contaminants entering the engine and causing wear or damage.
- Enhance the overall aesthetic appeal of your bike by restoring the gas tank to its former glory.
Regular maintenance and motorcycle fuel tank restoration are crucial for your bike’s health. By fixing gas tank issues, your motorcycle will run smoothly and reliably for years.
“A clean and well-maintained gas tank is the foundation for a healthy, high-performing motorcycle.”
Whether you’re working on a vintage motorcycle tank restoration or maintaining a modern bike, cleaning and restoring the gas tank is important. Understanding the value of a clean gas tank helps you keep your motorcycle in top shape.
Preparing for the Restoration Process
Before starting to fix your motorcycle’s gas tank, make sure you have all the tools and supplies. Also, know the safety steps. This prep work will help you do a great job, whether fixing a fuel tank dent repair or a full motorcycle gas tank repair.
Necessary Tools and Supplies
Here’s what you’ll need to begin:
- Sandpaper (various grits, from coarse to fine)
- Paint brushes and rollers
- Degreasing agent or solvent
- Metal filler or body filler (if needed for dents or damage)
- Primer and paint (for restoring painted motorcycle tanks)
- Protective gloves and eyewear
- Respirator or face mask
- Drop cloth or tarp to protect your work area
Safety Precautions
Working on a motorcycle gas tank needs special care. Make sure the area is well-ventilated to avoid harmful fumes. Wear a respirator or face mask to protect your lungs. Use gloves to prevent skin irritation or chemical exposure. Be careful with flammable materials or solvents. Keep a fire extinguisher nearby.
By getting the right tools and focusing on safety, you’re ready to restore your motorcycle’s gas tank. Next, we’ll guide you on how to remove the gas tank!
Step-by-Step Guide to Removing the Gas Tank
Removing the gas tank is the first big step in how to restore a motorcycle gas tank. By taking it apart, you can clean, fix, and make it look new again. Here’s how to safely take off your motorcycle’s gas tank.
- Disconnect the fuel line: Find the fuel line connection at the tank’s bottom. Carefully disconnect it. Have a pan ready for any fuel spills.
- Detach the tank mounting hardware: Look for bolts, screws, or other fasteners holding the tank to the bike. Remove them from different angles.
- Lift the tank: Lift the tank off the bike carefully. You might need help or a lift to avoid damage.
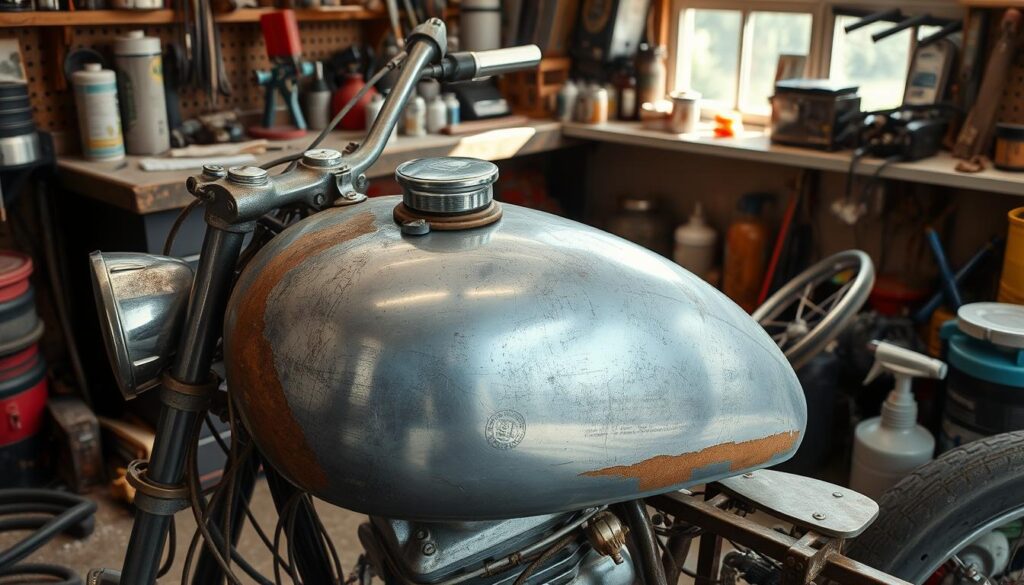
- Inspect the tank: After removing, check the tank for corrosion, rust, or debris. This will show you how much work it needs for motorcycle fuel tank restoration.
By doing these steps, you’ve removed the gas tank. Now, you’re ready for the next steps in making it look new again. Always be careful and safe to avoid any damage or spills.
“Removing the gas tank is the critical first step in the restoration process, as it allows you to access and address any issues within the tank itself.”
Tackling Rust and Corrosion
Rust and corrosion are big problems when restoring a motorcycle gas tank. They can harm the tank’s integrity and performance. We’ll look at chemical and mechanical ways to remove rust and make your tank shine again.
Chemical Rust Removal Methods
Chemical rust removers are very effective. They dissolve rust, making it easy to clean and prepare the tank. Always choose a safe product for metal tanks and follow the instructions.
Vinegar and water can also remove rust. Mix them, soak the tank, and then rinse it well. This method works for mild rust.
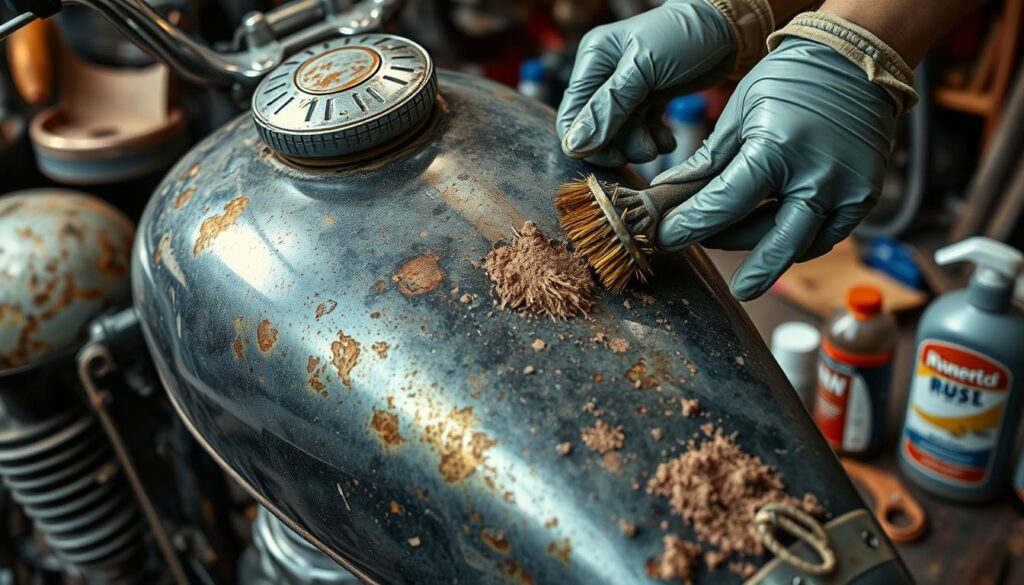
Mechanical Rust Removal Techniques
For a hands-on approach, use tools like sandpaper or wire brushes. These tools can scrub off rust. Always wear gloves and eye protection for safety.
Bead blasting is another method. It uses beads to blast away rust. But, you need the right equipment and know-how to avoid tank damage.
Removing rust well takes time and patience. Be thorough and don’t hesitate to mix chemical and mechanical methods for the best results.
| Method | Advantages | Disadvantages |
|---|---|---|
| Chemical Rust Removal | Effective in dissolving and lifting rust Relatively easy to apply Can reach hard-to-access areas | Requires careful handling and disposal Can be more expensive than mechanical methods May require multiple applications |
| Mechanical Rust Removal | Can provide a more thorough clean Allows for hands-on control Can be less expensive than chemicals | Requires physical effort and can be time-consuming Potential for accidental damage to the tank May not reach all areas as effectively as chemicals |
By using both chemical and mechanical methods, you can clean your motorcycle gas tank well. Always be safe and follow instructions when using chemicals or tools.
how to restore a motorcycle gas tank
Restoring a motorcycle gas tank is a fun DIY project. It can make a worn or damaged tank look new again. This guide will help you fix a tank with rust, corrosion, or a dull look, step by step.
To restore a tank well, you need a careful plan. First, remove the tank safely from your bike. Then, clean it of rust or corrosion with chemicals and tools.
After cleaning, focus on the tank’s inside. Choose a good lining to stop future rust and keep your fuel system working right. Next, paint the outside to make it look new again.
Finally, put the tank back on your bike. This guide will help you restore your motorcycle’s gas tank to its former glory. You’ll save money and feel proud of your work.
“Restoring a motorcycle gas tank is a rewarding DIY project that can breathe new life into your bike.”
- Carefully remove the gas tank from your motorcycle
- Clean and remove any rust or corrosion from the tank’s interior
- Apply a protective tank lining to prevent future issues
- Refinish the exterior with a fresh coat of paint
- Reassemble and reinstall the gas tank on your motorcycle
By following these steps, you can restore a motorcycle gas tank and make your bike new again. With patience and care, you’ll soon be riding again, enjoying your motorcycle gas tank repair work.
Sealing and Coating the Interior
After cleaning and preparing your motorcycle’s gas tank, it’s time to seal and coat the interior. This step protects it from corrosion and contaminants. The right tank lining is crucial for a long-lasting, leak-free fuel system. Let’s look at how to choose the best tank coating for your motorcycle restoration.
Choosing the Right Tank Lining
For motorcycle tank coating and metal fuel tank restoration, you have several options. Each type of tank lining has its own benefits. It’s key to think about what you need and prefer. Here are some popular tank lining choices:
- Epoxy-based coatings: These are durable, chemical-resistant, and protect against corrosion. They give a smooth finish that can handle motorcycle use.
- Urethane-based coatings: Urethane linings are flexible and impact-resistant. They’re great for motorcycles used on rough terrain.
- Ceramic-based coatings: Ceramic tank linings are tough and long-lasting against fuel, oil, and contaminants. They also resist scratches and abrasions.
| Coating Type | Durability | Flexibility | Chemical Resistance |
|---|---|---|---|
| Epoxy-based | Excellent | Moderate | Excellent |
| Urethane-based | Very Good | Excellent | Very Good |
| Ceramic-based | Excellent | Good | Excellent |
When picking a tank lining, think about your tank’s condition, riding conditions, and budget. Talking to a restoration expert can also guide you to the right choice for your metal fuel tank restoration needs.
Exterior Refinishing and Painting
After fixing the inside of your motorcycle’s gas tank, it’s time to work on the outside. Refinishing and painting the tank makes it look better and keeps it safe from damage. This part will help you get ready and paint your tank.
Preparing the Surface
To get a great paint job, you need to clean the tank well. Start by washing off dirt, grime, and old paint. You might need to use chemicals and rough tools to get it smooth.
If the tank has dents or scratches, fix them now. Use tools like a dent puller or body filler to make it smooth. This is key for fuel tank dent repair and will make your tank look perfect.
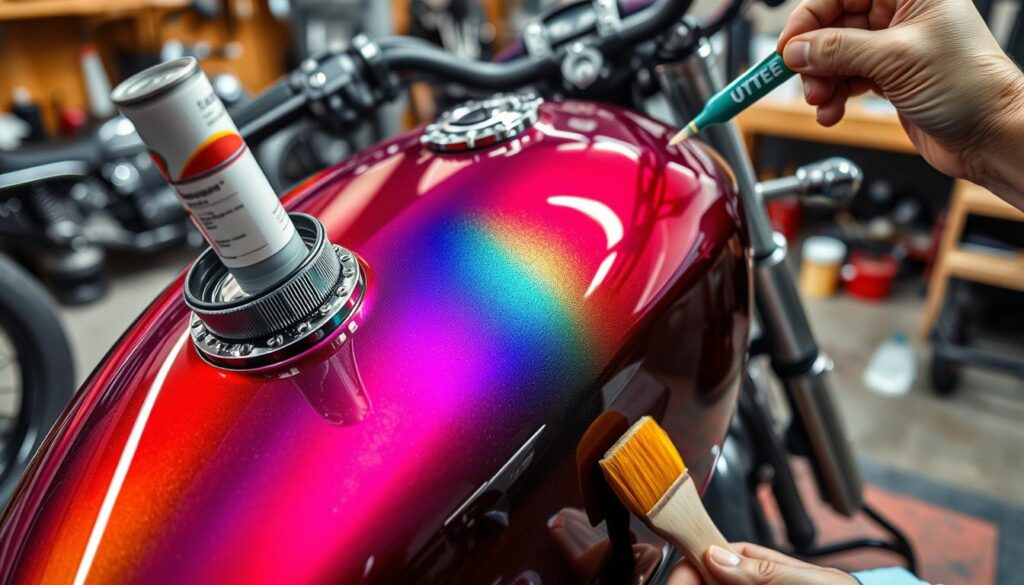
Applying a Fresh Coat of Paint
Now, it’s time to paint. Choose a good paint made for restoring painted motorcycle tanks. Think about how long it lasts, if it chips easily, and what finish you want.
Follow the paint’s instructions carefully. This might mean priming, applying several coats, and waiting for it to dry. Make sure the paint goes on evenly and watch out for weather that might mess with it.
With careful work and patience, you can make your motorcycle’s gas tank look like-new again. It will also stay safe from harm.
Reassembling and Reinstalling the Gas Tank
Now that your motorcycle’s gas tank is fixed, it’s time to put it back together. Start by carefully putting the tank back in place. Make sure all mounting points and connections are secure. Check that the fuel line is attached right and there are no leaks.
After the tank is back in place, check the area around it. Make sure the fuel petcock and fuel gauge work right. If your bike has an external fuel filter, now is the time to replace it. This ensures your fuel system works well.
With the tank in place and all connections checked, it’s time to fill it up and test it. Add fresh fuel carefully, avoiding spills. Start the engine and let it run for a few minutes. Watch for any leaks or problems. If everything looks good, you’re ready to ride and enjoy your hard work!
FAQ
How do I clean rust and corrosion from my motorcycle’s gas tank?
You can use chemicals or mechanical methods to clean your motorcycle’s gas tank. Chemicals like phosphoric acid or naval jelly work well. For mechanical methods, try sanding, bead blasting, or using a tank rotisserie. Always wear safety gear when using chemicals or power tools.
What type of lining or coating should I use to seal the interior of my gas tank?
You have many options for sealing your gas tank’s interior. Epoxy-based coatings, urethane liners, and fuel tank sealers are good choices. Think about chemical resistance, flexibility, and your motorcycle’s use when picking a lining.
How do I properly prepare the surface of my gas tank before painting?
Good surface prep is crucial for a lasting paint job. Clean the tank well, removing rust or corrosion. Sand it lightly to smooth out the surface. Don’t forget to degrease and prime the tank before painting.
What safety precautions should I take when restoring a motorcycle gas tank?
Safety is most important when restoring a gas tank. Wear gloves, eye protection, and a respirator to protect yourself from chemicals. Work in a well-ventilated area and avoid sparks or flames, as gasoline vapors are flammable.
How do I properly reinstall the gas tank after the restoration is complete?
When putting the gas tank back on, reconnect all fuel lines, vents, and electrical connections carefully. Make sure the tank is securely mounted and there are no leaks. Start the engine and check for any problems before riding.


")
